DIY webmasters often face hurdles when importing large MySQL databases via Phpmyadmin due to size limitations and timeouts. This need can arise in various scenarios, such as restoring a site after a hack, moving to a new hosting service, or implementing local changes.In 2016, I wrote this guide so I could remember the steps. Since I'm about to delete that page, I wanted to still keep the information in case I need it again and wanted to publish it here in case it might be useful to some of you. Now, I don't know how current this guide is (which is why I haven't published it as a resource) and I haven't tested it recently. The guide was translated using chatgpt.
2. The Solution - SSH: SSH protocol provides a secure channel for hosting account communication. Check its availability in your hosting account's 'Cpanel' and consult technical support if needed.
3. Preparing for SSH Access: Within Cpanel, locate or request necessary SSH account details:
- Username
- Port
- Hostname
- Password
5. Managing Files via FTP: You'll need File Zilla, an FTP client, to access and manage your website's folders.
6. Initiating the Process:
- Open File Zilla and connect to your web space.
- Create a new folder named 'BackupDB'.
- Upload the large .sql database file to this folder.

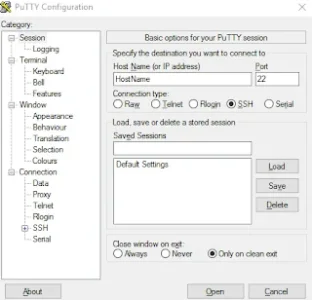
- Open Putty to get started.
- Enter the HostName and Port, and click Open.

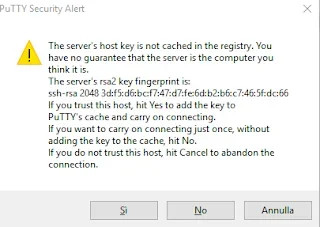
If a security alert appears, click NO.
8. SSH Account Login: In Putty's new window:

- Type your SSH account's username and press Enter.
- Enter the password and press Enter again.
Code:
mysql -h [Host Name] -u [SSH Username] -p[SSH User Password] [Database Name] < /home/www/[Website Name]/BackupDB/[Database File Name].sql- Ensure all the necessary fields are correctly filled.
- Create a .php file named 'path.php'.
- Insert the following code:
PHP:
<?php
 $path = getcwd();
 echo "The absolute path of my backupDB folder is: ";
 echo $path;
?>- Use File Zilla to place this file in the relevant FTP folder and access it through your browser to get the path.
- Replace the command in Putty with the absolute path.
- Copy and paste the command into Putty and press Enter.
- If all steps are correctly followed, your database will be uploaded successfully.
Last edited: