I gave it a go because I was interested in how it was done and I also wondered if there was any way I could also make it easier to edit colours without manually editing the image at the same time.
Hope I've done it correctly for exporting, Photoshop isn't my day job just a hobby!
Here is the finished PSD file. Had to upload it elsewhere as this forum does not allow 4.4 MB files to be attached to posts. (please don't share the link outside this forum, it's my own web space with finite bandwidth.)
Things to note about this file.
I did not include every single image the default XF style uses, I didn't imagine anyone would want to edit the colour swatch for example.
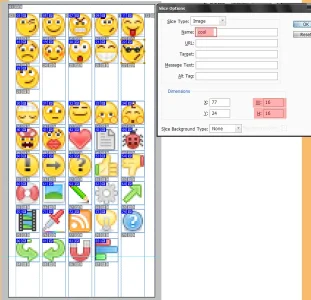
images that come as a single image that contains multiple images (I assume they are placed with the CSS position technique) have been kept as a single slice so it remains a single image when exported.
The images are not grouped into folders in the layers panel, but were imported one folder at a time, so can probably be grouped by someone else easily enough if needed as they will still be in order.
Each image is on a separate layer for easy separate editing.
At the bottom of the layers list, there is a layer of solid 50% grey I used to see the semi transparent images better while working with them. It's hidden by default. Make sure it's hidden or deleted before you export for web or you will get grey backgrounds in your images!
I didn't include the old beta smilies, sorry. I don't plan on adding them either.
Each layer is a smart object. This means double click it's thumbnail in the layers pannel to edit each image separately then use File> Save and the original image will update with your changes automatically. (You don't need to do this for changing colours like I show below, only if you want to manually edit the image in some way.)
When you are done editing, to export your images click on:
File >
Save for Web & Devices
You will get a preview windows giving you various options to optimize the images, how many colours they will use each etc. when happy with the preview just click
Done.
Changing colors:
Every layer/image in this PSD file has a hue/saturation adjustment layer tied to it. (they appear above each layer/image in the layers panel.) This is so you can alter the colour of the image easily if desired. These adjustment layers do nothing in the file by default encase you don't want to change the colour. (See below for how to activate and use them)
Open the PSD file in photoshop and make sure you have both the layers panel and adjustment panel visible to you. (go to the Window menu at the top and tick them if not.)
In the layers panel, find the image you want to change the colour of. All the layers have the same names as the original XF file name for the image in question. You can use the hue/saturation layer to colorize the layer. (it is set up to only apply to that layer)
Example/How to:
In this example I'll use the smiley with the big grin.
Find the 'biggrin' layer and click on the Hue/Saturation layer directly
above it.

In the Adjustments panel, tick the Colorize box then move the 3 sliders at the top to any position you like to get the colour you want. Here I made it purple!

This is not the perfect solution because it only really works with images that generally involve multiple shades of a single colour. (such as most of the smilies) If the images have multiple colours in them you can still do this, but you can't change the colours separately, only all together.
Ps: If it's any use for it, Kier is free to use anything from this PSD for his own kit if/when it gets done.

")
")