Create a time-line in Xenforo

Create a time-line in Xenforo

Basenotes

Well-known member
Grant submitted a new resource:

Create a time-line in Xenforo - Use Custom BB Code and CSS to create timelines in your xenforo posts

Here's how you can use BBCode and CSS to create a timeline in a xenforo post.

(based on this code here)

Step 1​


Paste the following into your extra.less file

CSS:
/* Start timeline css */


.timeline {
  position: relative;
  max-width: 1200px;
  margin: 0 auto;
    background:black;
}

.timeline::after {
  content: '';
  position: absolute;
  width: 6px;
  background-color: white;
  top: 0...

Read more about this resource...
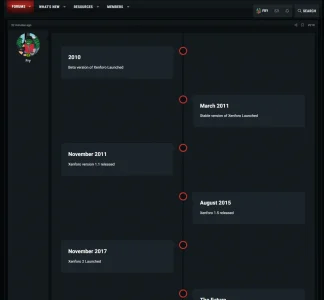
 
Great resource! I've changed the CSS a little to inherit style colors a little easier:

Code:
/* Start timeline css */

@timelinebg: @xf-contentHighlightBg;
@eventbg: xf-intensify(@xf-contentHighlightBg, 3.5%);

.timeline
{
    position: relative;
    max-width: 1200px;
    margin: 0 auto;
    background: @timelinebg;
    color: contrast(@timelinebg);
    &:after
    {
        content: '';
        position: absolute;
        width: 6px;
        background-color: @xf-contentBg;
        top: 0;
        bottom: 0;
        left: 50%;
        margin-left: -3px;
    }
    .xftlcontainer
    {
        padding: @xf-paddingLarge 40px;
        position: relative;
        background-color: inherit;
        width: 50%;
        &:after
        {
            content: '';
            position: absolute;
            width: 25px;
            height: 25px;
            right: -17px;
            background-color: @xf-contentBg;
            border: 4px solid @xf-borderColorAttention;
            top: 15px;
            border-radius: 50%;
            z-index: 1;
        }
        &.xftlleft
        {
            left: 0;
            &:before
            {
                content: " ";
                height: 0;
                position: absolute;
                top: 22px;
                width: 0;
                z-index: 1;
                right: 30px;
                border: medium solid @eventbg;
                border-width: 10px 0 10px 10px;
                border-color: transparent transparent transparent @eventbg;
            }
        }
        &.xftlright
        {
            left: 50%;
            &:before
            {
                content: " ";
                height: 0;
                position: absolute;
                top: 22px;
                width: 0;
                z-index: 1;
                left: 30px;
                border: medium solid @eventbg;
                border-width: 10px 10px 10px 0;
                border-color: transparent @eventbg transparent transparent;
            }
            &:after {
                left: -16px;
            }
        }
    }
    .xftlcontent
    {
        padding: 20px 30px;
        background-color: @eventbg;
        position: relative;
        border-radius: 6px;
    }
}
@media (max-width: @xf-responsiveMedium)
{
    #XF .timeline
    {
        &:after
        {
            left: 31px;
        }
        .xftlcontainer
        {
            width: 100%;
            padding-left: 70px;
            padding-right: 25px;
        }
        .xftlcontainer::before
        {
            left: 60px;
            border: medium solid @eventbg;
            border-width: 10px 10px 10px 0;
            border-color: transparent @eventbg transparent transparent;
        }
        .xftlleft::after, .xftlright::after
        {
            left: 15px;
        }
        .xftlright
        {
            left: 0%;
        }
    }
}

/* End timeline CSS */

You can now update these variables at the top, timelinebg is the wrapper background while eventbg controls the background color of each event along with the arrows.

Code:
@timelinebg: @xf-contentHighlightBg;
@eventbg: xf-intensify(@xf-contentHighlightBg, 3.5%);

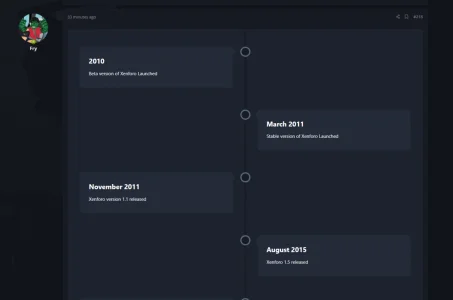
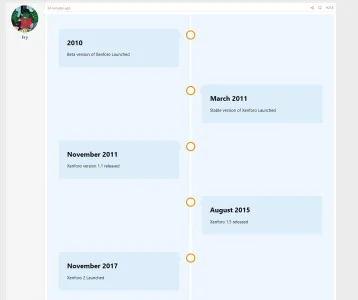
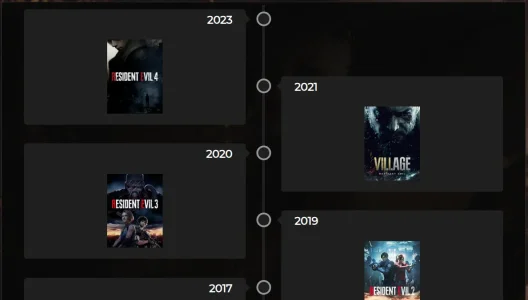
Should play nicely with any style:
1.png2.png3.png
 
Last edited:
nice one thank you.

i noticed one thing that made me ponder the responsive code some.....its not a big deal at all and honestly i havent checked any mobile devices or anything....

what i noticed tho, fwiw, was that in the FAQ the example instance, the code fails to shrink the text so its cutting words in half and such....i guess because the "post view" is smaller but the device viewport is normal.....fwiw.......not sure thats even a problem, just something i noticed and wondered about....

regards
 
the code fails to shrink the text so its cutting words in half and such....i guess because the "post view" is smaller but the device viewport is normal.....fwiw.......not sure thats even a problem,
I would say cutting words in half actually is a problem.

However I tried this out and didn’t notice that happening
 
You can replace hard coded colours with e.g. @xf-borderColorFeature, which will automatically pick up the colours from the palette and style properties.
Thanks, exactly what I needed to know. And, I see it's now included within original code.
 
Back
Top Bottom